

Creating effective forms is a crucial aspect of managing a successful website. Whether you need a simple contact form, a registration form, or a complex multi-page survey, having the right tools can make all the difference. Enter WPForms, one of the most popular and user-friendly form builder plugins for WordPress.
WPForms is designed to help website owners and developers create powerful, customizable forms without requiring any coding knowledge. Its intuitive drag-and-drop interface, coupled with a vast array of features, makes it an ideal choice for both beginners and experienced users. From small business owners needing a basic contact form to large organizations requiring intricate forms with conditional logic, WPForms caters to a wide range of needs.
In this comprehensive guide, we’ll explore everything you need to know about WPForms. We’ll cover its key features, how to install and set it up, and provide step-by-step instructions for creating your first form. Additionally, we’ll delve into advanced functionalities, such as conditional logic and multi-page forms, and offer tips on customizing your forms to match your website’s design.
By the end of this guide, you’ll have a thorough understanding of how to leverage WPForms to enhance your website’s user experience and streamline your data collection processes. Let’s dive in and discover how WPForms can transform your WordPress site.
What is WPForms?
WPForms is a powerful and user-friendly form builder plugin designed specifically for WordPress. It allows users to create a wide variety of forms, ranging from simple contact forms to complex multi-page forms with conditional logic, all without needing any coding skills.
Key Features and Benefits
Image Source: wpforms.com
- Drag-and-Drop Builder:
The intuitive drag-and-drop interface makes form creation easy, even for beginners. You can add, remove, and rearrange form fields with just a few clicks. - Pre-built Form Templates:
WPForms offers a library of pre-built form templates to help you get started quickly. Whether you need a contact form, registration form, survey form, or payment form, there’s a template to suit your needs. - Responsive and Mobile-Friendly:
All forms created with WPForms are fully responsive, ensuring they look great and function well on any device, including smartphones and tablets. - Conditional Logic:
This feature allows you to create dynamic forms that change based on user input. Show or hide fields, sections, or entire pages based on specific conditions, providing a personalized experience for your users. - Multi-Page Forms:
Break long forms into multiple pages to improve user experience and reduce form abandonment. Each page can have its own title and description, making complex forms easier to navigate. - Integrations:
WPForms integrates seamlessly with popular email marketing services, payment gateways, and other third-party applications. This includes services like Mailchimp, PayPal, Stripe, and more, enabling you to automate workflows and streamline processes. - Spam Protection:
Built-in spam protection features, such as CAPTCHA and honeypot fields, help keep your forms secure and free from unwanted submissions. - Entry Management:
Easily manage and review form submissions from your WordPress dashboard. You can view, edit, and export entries, as well as set up email notifications to stay informed about new submissions.
Comparison with Other Form Plugins
WPForms stands out from other form plugins due to its balance of simplicity and advanced features. While there are many form plugins available for WordPress, WPForms combines ease of use with powerful functionality, making it suitable for both beginners and advanced users. Plugins like Contact Form 7 may offer basic form creation capabilities, but WPForms provides a more comprehensive solution with its extensive feature set and user-friendly interface.
In summary, WPForms is an essential tool for any WordPress site owner looking to create effective and engaging forms. Its powerful features, ease of use, and seamless integrations make it a top choice for building forms that enhance user experience and drive conversions.
Installing and Setting Up WPForms
Getting started with WPForms is straightforward and hassle-free. This section will guide you through the process of installing and setting up WPForms on your WordPress site.
Step-by-Step Guide to Installing WPForms

- Accessing Your WordPress Dashboard:
- Log in to your WordPress admin area.
- Navigate to the dashboard, where you will manage your plugins and settings.
- Installing WPForms:
- Go to the “Plugins” menu on the left sidebar and click on “Add New.”
- In the search bar, type “WPForms.”
- Locate the “WPForms” plugin from the list of results.
- Click the “Install Now” button next to WPForms.
- Once the installation is complete, click “Activate” to enable the plugin on your site.
- Initial Setup and Configuration:
- After activation, you will see a new WPForms menu item in your WordPress dashboard.
- Click on “WPForms” and then on “Settings” to configure the plugin settings.
- Enter your license key if you have purchased a premium version of WPForms. You can find the license key in your WPForms account.

Overview of the WPForms Dashboard
Once WPForms is installed and activated, you’ll be taken to the WPForms dashboard. Here’s a quick overview of the main features and options you’ll find:
-
- Form Builder:
The Form Builder is the heart of WPForms. This drag-and-drop interface allows you to create and customize your forms effortlessly. You can add fields, rearrange them, and configure their settings with ease. - Form Templates:
WPForms offers a variety of pre-built form templates to help you get started quickly. Whether you need a contact form, feedback form, or a survey form, you can choose a template and customize it to suit your needs. - Entries:
The Entries section lets you view and manage all the submissions you receive through your forms. You can search, filter, and export entries as needed. - Add-Ons:
WPForms supports a range of add-ons that enhance its functionality. You can access and activate these add-ons from the Add-Ons page. Popular add-ons include payment integrations, marketing tools, and form enhancements. - Settings:
The Settings page allows you to configure global settings for WPForms, such as general settings, email notifications, reCAPTCHA, and more.
- Form Builder:
Configuring Basic Settings
Before you start creating forms, it’s essential to configure some basic settings:
- General Settings:
- Navigate to WPForms > Settings > General.
- Here, you can set your organization’s name and email address. These details will be used in form notifications.
- Email Settings:
- Go to WPForms > Settings > Email.
- Configure the default email notifications settings for your forms, such as the sender name, sender email, and reply-to address.
- reCAPTCHA:
- To protect your forms from spam, you can integrate Google reCAPTCHA.
- Go to WPForms > Settings > reCAPTCHA and enter your reCAPTCHA site key and secret key.
By following these steps, you’ll have WPForms installed and configured, ready to start creating powerful and user-friendly forms for your WordPress site. In the next section, we’ll walk you through creating your first form using the WPForms Form Builder.
Creating Your First Form
Creating your first form with WPForms is a breeze, thanks to its intuitive drag-and-drop builder. In this section, we’ll guide you through the process of setting up a simple contact form, which is one of the most commonly used forms on any website.
How to Create a Simple Contact Form
- Accessing the Form Builder:
- In your WordPress dashboard, navigate to WPForms > Add New.
- This will open the WPForms Form Builder interface, where you can start creating your form.
- Selecting a Template:
- WPForms offers several pre-built templates to help you get started quickly. For a basic contact form, select the “Simple Contact Form” template.
- Click on the template to load it into the Form Builder.
- Adding and Customizing Form Fields:
- The Simple Contact Form template includes the essential fields for a contact form: Name, Email, and Message. You can add more fields by dragging them from the left panel into the form area.
- To customize a field, click on it to open its Field Options. Here, you can change the field label, add a description, make the field required, and more.
- Customizing the Form:
- You can rearrange the order of the fields by dragging them up or down.
- If you need to remove a field, click on it and then click the trash icon to delete it.
- To add advanced fields like checkboxes, radio buttons, or file uploads, simply drag them from the Advanced Fields section into your form.
Explanation of the Drag-and-Drop Builder
Whether constructing a basic contact form or an intricate ordering system complete with payment gateways, WPForms’ drag-and-drop form builder empowers users to effortlessly position elements exactly where they desire on the page. Image Source: isitwp.com
The drag-and-drop builder is one of the standout features of WPForms. It allows you to create and customize forms with ease, even if you have no coding experience. Here’s a quick overview of how it works:
- Form Fields Panel: Located on the left side, this panel contains all the available form fields. You can choose from Standard Fields (like text, email, and dropdown), Fancy Fields (like phone number, address, and date/time), and Payment Fields (like single item, multiple items, and total).
- Form Preview Area: This is where you build your form. Simply drag fields from the left panel into this area to add them to your form.
- Field Options: When you click on a field in the Form Preview Area, the Field Options panel on the left will change to show customization options for that specific field.
Adding Fields and Customizing the Form
- Standard Fields:
- These include basic fields like Single Line Text, Paragraph Text, Dropdown, Multiple Choice, and Checkboxes.
- For example, to add a phone number field, drag the “Phone” field from the Standard Fields section into your form.
- Fancy Fields:
- These include more advanced fields like Name, Email, Address, Date/Time, and File Upload.
- For instance, to allow users to upload files, drag the “File Upload” field into your form. You can customize the file types allowed and set a maximum file size.
- Payment Fields:
- If you need to create a form that collects payments, you can use fields like Single Item, Multiple Items, Dropdown Items, and Total.
- For example, to add a payment option, drag the “Single Item” field into your form and customize the item name and price.
Saving and Previewing Your Form
Once you’ve added and customized your fields, it’s essential to save your form and preview it to ensure everything looks and functions as expected.
- Saving Your Form:
Click the “Save” button at the top right corner of the Form Builder to save your changes. - Previewing Your Form:
Click the “Preview” button next to the Save button to see how your form will look on your website. This allows you to test the form and make any necessary adjustments before publishing it.
By following these steps, you’ll have a fully functional contact form ready to be embedded on your WordPress site. In the next section, we’ll cover advanced form features like conditional logic and multi-page forms to help you create more dynamic and interactive forms.
Advanced Form Features
WPForms offers a range of advanced features that allow you to create more dynamic and interactive forms. In this section, we’ll explore how to use conditional logic, create multi-page forms, and integrate with third-party services to enhance your forms’ functionality.
Using Conditional Logic
Image Source: isitwp.com
Conditional logic is a powerful feature that allows you to create dynamic forms that change based on user input. This feature can help improve user experience by showing or hiding fields, sections, or entire pages based on specific conditions.
- Adding Conditional Logic to Fields:
- In the Form Builder, click on the field to which you want to add conditional logic.
- In the Field Options panel, scroll down to the “Smart Logic” section and toggle the “Enable Conditional Logic” switch.
- Set the condition for showing or hiding the field. For example, you can show a text field only if the user selects a specific option from a dropdown menu.
- Examples of Conditional Logic:
- Show a phone number field only if the user selects “Phone” as their preferred contact method.
- Display additional questions if the user answers “Yes” to a specific question.
- Hide payment fields unless the user selects a paid option from a list of services.
Creating Multi-Page Forms
Multi-page forms help improve user experience by breaking long forms into manageable sections. This approach can reduce form abandonment and make it easier for users to navigate complex forms.
- Adding a New Page:
- In the Form Builder, drag the “Page Break” field from the left panel into your form where you want to start a new page.
- This will split your form into multiple pages. You can add as many Page Break fields as needed to create multiple pages.
- Customizing Page Titles and Descriptions:
- Click on the Page Break field to customize the title and description for each page. This helps users understand the purpose of each section.
- You can also customize the pagination buttons (e.g., “Next” and “Previous”) to match your form’s language and style.
- Navigating Between Pages:
- Users can navigate between pages using the “Next” and “Previous” buttons. Ensure your form is intuitive by providing clear instructions and guidance on each page.
Integrating with Third-Party Services
 WPForms seamlessly integrates with various third-party services, allowing you to automate workflows and enhance your form’s functionality. Popular integrations include email marketing services, payment gateways, and CRM systems.
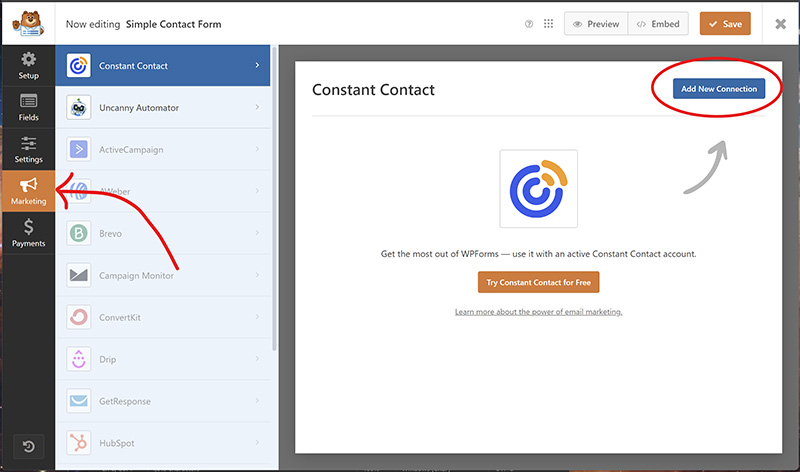
- Email Marketing Integrations:
- WPForms supports integrations with popular email marketing services like Mailchimp, AWeber, and Constant Contact.
- To integrate an email service, go to WPForms > Add-Ons and install the desired email marketing add-on.
- After installation, go to the Form Builder and click on “Marketing” to configure the integration settings. You can set up actions like adding form submissions to your email lists automatically.
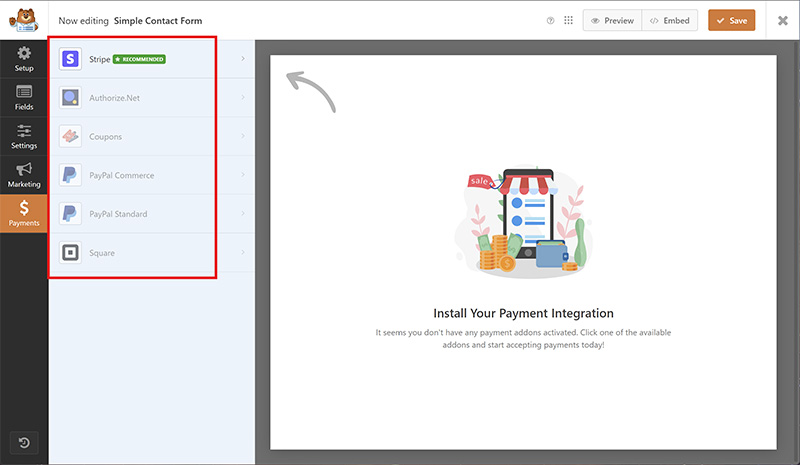
- Payment Gateway Integrations:
- WPForms allows you to accept payments through integrations with PayPal, Stripe, and Authorize.Net.
- To integrate a payment gateway, install the corresponding add-on from WPForms > Add-Ons.
- In the Form Builder, add payment fields (e.g., Single Item, Multiple Items, Total) to your form and configure the payment settings under “Payments.”
- CRM and Other Integrations:
- WPForms can integrate with CRM systems like Salesforce and HubSpot, as well as other services like Zapier for more advanced automation.
- To set up these integrations, install the relevant add-ons and follow the configuration instructions provided in the WPForms documentation.
- By leveraging these advanced features, you can create more interactive, user-friendly, and powerful forms that cater to the specific needs of your audience. In the next section, we’ll discuss how to customize the appearance of your forms to ensure they match your website’s design and branding.
Customizing Form Appearance
Creating a form that not only functions well but also matches the aesthetic of your website is essential for maintaining a cohesive user experience. WPForms offers various customization options to help you style your forms to fit seamlessly into your site’s design.
How to Style Your Forms to Match Your Website
- Using the Form Styler Add-on:
- WPForms provides a Form Styler add-on that allows you to customize the appearance of your forms without any coding.
- To enable the Form Styler, go to WPForms > Add-Ons and install the Form Styler add-on.
- Once activated, navigate to the Form Builder and click on the “Design” tab. Here, you can choose from various pre-designed form styles or create a custom style that matches your website’s branding.
- Customizing Individual Fields:
- Click on any form field in the Form Builder to open the Field Options panel.
- Here, you can adjust the label, placeholder text, and CSS class for each field. Adding custom CSS classes allows for more granular control over the appearance of individual fields.
- Styling Buttons:
- Customize the form’s submit button by clicking on it in the Form Builder.
- In the Field Options panel, you can change the button text, size, color, and alignment to match your site’s design.
Using CSS for Advanced Customization
For more advanced styling, you can use custom CSS to further enhance the appearance of your forms. This approach gives you complete control over every aspect of your form's design.
- Adding Custom CSS Classes:
- Assign custom CSS classes to form elements by adding the class names in the Field Options panel.
- For example, if you want to style the name field differently, you might add a class like custom-name-field.
- Writing Custom CSS:
- Navigate to Appearance > Customize in your WordPress dashboard to access the theme customizer.
- Click on "Additional CSS" and enter your custom CSS rules. For example:
.custom-name-field
.wpforms-submit
.wpforms-submit:hover
- Testing and Tweaking:
- After adding your custom CSS, preview your form on your website to ensure it looks and functions as expected.
- Make any necessary adjustments to your CSS rules to achieve the desired appearance.
Examples of Well-Designed Forms
To inspire your customization efforts, here are a few examples of well-designed forms using WPForms:
- Minimalist Contact Form:
- A simple, clean design with plenty of white space.
- Uses subtle borders and light colors to create a professional look.
- Custom CSS enhances the submit button with a hover effect.
- Bold and Colorful Survey Form:
- Incorporates vibrant colors that match the site’s branding.
- Uses custom fonts and styled input fields to create a lively, engaging form.
- Conditional logic ensures only relevant questions are shown to the user.
- Elegant Registration Form:
- A sophisticated design with custom fonts and stylish form fields.
- Multi-page setup breaks the registration process into manageable steps.
- Custom styling ensures a seamless integration with the site’s overall aesthetic.
By taking advantage of WPForms’ customization options and using custom CSS for advanced styling, you can create forms that not only perform well but also look great and enhance the overall user experience on your site. In the next section, we’ll cover the various methods to embed your forms on your WordPress site.
Embedding Forms on Your WordPress Site
Once you’ve created and customized your forms with WPForms, the next step is to embed them on your WordPress site. WPForms provides multiple methods to do this, ensuring that your forms can be easily placed in posts, pages, widgets, and more.
Different Methods to Embed Forms

- Embedding with Shortcodes:
- Every form you create with WPForms is assigned a unique shortcode.
- To find the shortcode, navigate to WPForms > All Forms in your WordPress dashboard.
- Copy the shortcode for the form you want to embed.
- Paste the shortcode into any post, page, or widget where you want the form to appear.
- Using the WPForms Block in the Block Editor:
- If you are using the WordPress Block Editor (Gutenberg), WPForms provides a dedicated block for easy embedding.
- In the editor, click the “+” button to add a new block.
- Search for “WPForms” and select the WPForms block.
- Choose the form you want to embed from the dropdown menu in the block settings.
- Embedding in Classic Editor:
- If you are using the Classic Editor, WPForms integrates seamlessly with it.
- Click the “Add Form” button located above the editor toolbar.
- Select the form you want to embed from the popup window and click “Add Form.”
- The shortcode for the form will be automatically inserted into your post or page.
- Adding Forms to Widget Areas:
- WPForms can also be embedded in your site’s widget areas, such as sidebars and footers.
- Go to Appearance > Widgets in your WordPress dashboard.
- Drag the “WPForms” widget to your desired widget area.
- Select the form you want to display from the dropdown menu and click “Save.”
- Embedding with PHP Code:
- For advanced users, forms can be embedded directly in theme files using PHP.
- Use the following code to embed a form, replacing FORM_ID with the ID of your form:
echo do_shortcode(‘[wpforms id=”FORM_ID”]’);
Best Practices for Form Placement
- Positioning Forms for Maximum Engagement:
- Place contact forms on your “Contact Us” page and consider adding a smaller contact form in your footer or sidebar for easy access.
- Embed newsletter signup forms prominently on your homepage or as a popup to capture leads.
- Use multi-step forms for longer surveys or registrations to keep users engaged without overwhelming them.
- Ensuring Mobile Responsiveness:
- Test your forms on different devices to ensure they are mobile-friendly.
- WPForms is designed to be responsive, but it’s good practice to check that all fields and buttons are easily accessible on smaller screens.
- Using Clear and Compelling CTAs:
- Your form’s call-to-action (CTA) should be clear and compelling to encourage submissions.
- Use action-oriented language like “Submit,” “Sign Up,” or “Get Started” for your submit buttons.
- Customize the appearance of your CTA button to make it stand out.
Troubleshooting Common Embedding Issues
- Form Not Displaying Correctly:
- Ensure you have copied and pasted the correct shortcode.
- Check for any theme or plugin conflicts that might be affecting the form’s display. Try switching to a default theme (like Twenty Twenty-One) to see if the issue persists.
- Form Submissions Not Working:
- Verify that your form settings are configured correctly, especially the email notifications and confirmation settings.
- Ensure there are no JavaScript errors on the page that could interfere with form functionality. You can check for errors using your browser’s developer tools.
- Styling Issues:
If your form’s styling doesn’t match your site’s design, check for CSS conflicts. You can add custom CSS to override any conflicting styles.
Use WPForms’ built-in form styler or custom CSS classes to adjust the appearance as needed.
By following these methods and best practices, you can seamlessly embed WPForms on your WordPress site, ensuring that your forms are easily accessible and function smoothly. In the next section, we’ll explore how to manage form entries and set up notifications to stay informed about new submissions.
Managing Form Entries
Effectively managing form entries is crucial for keeping track of user submissions and ensuring timely responses. WPForms provides a comprehensive suite of tools to help you view, manage, and export form entries directly from your WordPress dashboard.
Viewing and Managing Form Entries
To view form entries, navigate to WPForms > Entries in your WordPress dashboard. This will display a list of all forms you’ve created. Select the form for which you want to view entries. You’ll be taken to a screen showing all submissions for that form. Each entry includes detailed information, such as the user’s input, submission date, and IP address.
You can click on any entry to view its details. This detailed view allows you to see all the data submitted through the form, along with any file uploads. You can also add notes, print the entry, or mark it as read/unread.
Setting Up Email Notifications
Email notifications ensure you stay informed about new form submissions. To set up notifications, go to the Form Builder and click on the “Settings” tab. Under “Notifications,” you can configure the email address where you want to receive notifications. You can customize the notification email’s subject, message, and include all form fields in the email body.
For more advanced setups, you can create multiple notifications. For example, you might want to send a confirmation email to the user who submitted the form and a notification to your team. This can be done by clicking “Add New Notification” and configuring the settings accordingly.
Exporting Form Entries
WPForms allows you to export form entries to a CSV file, making it easy to analyze data or import it into other applications. To export entries, go to WPForms > Tools in your WordPress dashboard. Under the “Export” tab, select the form whose entries you want to export. Choose the fields you want to include in the export and click “Download Export File.” This will generate a CSV file containing the selected entries.
Ensuring Data Privacy and Security
Managing form entries also involves ensuring data privacy and security. WPForms includes features like GDPR compliance settings to help you handle user data responsibly. You can enable GDPR enhancements under WPForms > Settings > GDPR. This allows you to add a GDPR agreement field to your forms, ensuring users consent to data collection.
Additionally, it’s crucial to keep your WordPress site secure by regularly updating plugins, themes, and the WordPress core. Use strong passwords for your admin accounts and consider implementing additional security measures like two-factor authentication and security plugins.
By effectively managing form entries, setting up email notifications, and ensuring data privacy, you can maintain an organized and secure process for handling user submissions. In the next section, we’ll explore the various add-ons and integrations available with WPForms to extend its functionality.
WPForms Add-Ons and Integrations
WPForms currently has 34 different addons in its library to level up your form-building. From seamless email marketing integrations to interactive survey features, these addons cater to a range of needs, ensuring a professional touch to your website’s functionality.
1. User Registration Addon
There are various motivations for encouraging user registration on your WordPress site. Whether it’s to grant access to exclusive content, expand your email list, or boost engagement, WPForms has got you covered.
With its user registration addon, this contact form plugin simplifies the visitor signup process. Activating this addon empowers you to construct personalized user registration forms, facilitating the creation of visitor profiles directly on your WordPress site. This functionality enables visitors to engage with your site and tailor their profiles to their preferences, ultimately enhancing the overall user experience.

Watch the Video
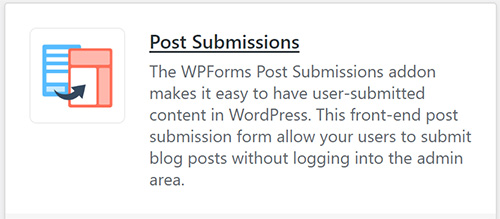
2. Post Submissions Addon
 Embracing guest posts remains a time-honored tradition and a wise strategy for several reasons.
They inject a fresh perspective and expertise into your content, enriching its diversity and appeal to your audience. Collaborating with industry professionals through guest posts expands your reach and fosters community engagement. Moreover, integrating guest posts can significantly enhance SEO, potentially leading to improved rankings.
However, executing guest posts improperly could tarnish your reputation and diminish the credibility of your site. To ensure you accept guest post submissions with finesse, WPForms offers its Post Submissions addon. This addon facilitates the acceptance of guest posts directly through a form on your WordPress site frontend, without necessitating user registration.
This streamlined submission process offers visitors a user-friendly and expedited means to share their content. Additionally, bypassing user registration enhances security measures. As with all WPForms, you have full customization capabilities for the guest post submission form, allowing adjustments to color schemes, layouts, fonts, and more.
Furthermore, users can compose and format their posts directly within the form, utilizing Rich Text for styling options. This feature minimizes text errors commonly associated with content submission via forms.
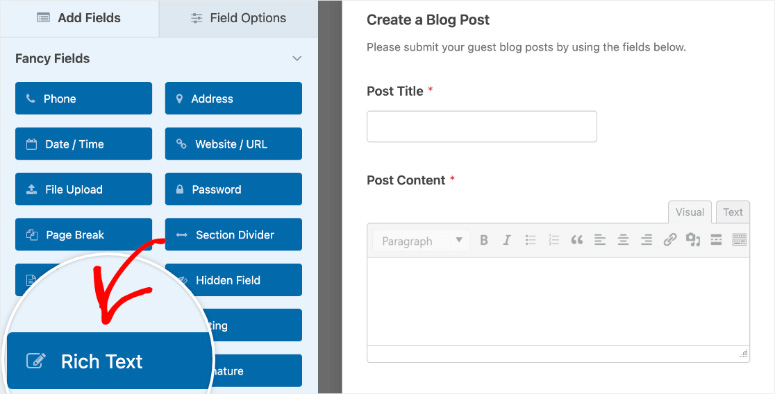
Image Source: isitwp.com
Watch the Video
Before submission, users can categorize their content, facilitating streamlined organization of guest post submissions. Moreover, setting a default post status (e.g., Pending, Draft, In Review) enhances communication efficiency and instills confidence in guest post contributors, reassuring them that their submissions are being considered.
3. Surveys and Polls Addon
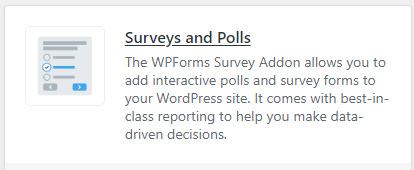 WPForms offers seamless management of surveys and polls through its dedicated addon. The survey and polls addon introduces robust features, including survey templates, Likert scale surveys, NPS surveys, polls, and star ratings.
Moreover, WPForms enables real-time monitoring of all surveys and polls, providing immediate access to incoming submissions. This allows for prompt adjustments to forms to enhance submissions or facilitate timely decision-making.
Furthermore, an impressive capability of this addon is the effortless export of survey data, eliminating unnecessary hassle. This facilitates the integration of information from external applications into WPForms, expanding the scope of available data for analysis and utilization. Additionally, users benefit from a diverse array of data formats for comprehensive data utilization and analysis.
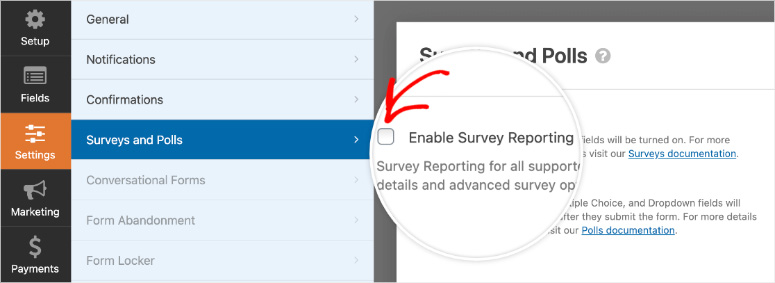
Image Source: isitwp.com
Watch the Video
4. Form Abandonment Addon
As a website owner, one of the most exasperating situations is when visitors initiate form submissions but fail to complete them, potentially resulting in lost leads.
Form abandonment can occur due to various reasons, such as visitor distraction or perception of the form being too lengthy or intrusive. Fortunately, WPForms offers a solution through its Form Abandonment feature. However, to access this functionality, users need to install the Form Abandonment addon, which seamlessly integrates with the WPForms plugin.
Watch the Video
This addon effectively saves information entered by users before they abandon the form, enabling website owners to follow up with them and encourage completion. Additionally, it allows for gathering feedback on the reasons for abandonment, providing valuable insights to better understand and personalize form experiences for the audience.
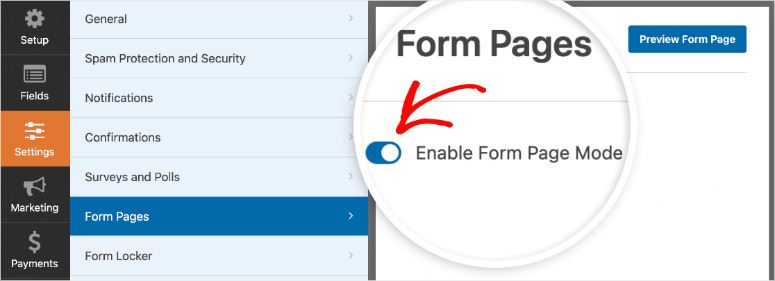
5. Forms Pages Addon for Landing Pages
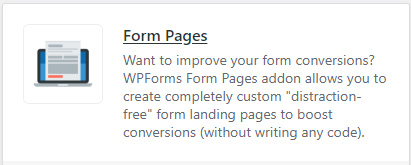 If you’re seeking a tool for crafting compelling landing pages to promote your brand or specific products online, WPForms’ Form Pages addon is the perfect solution. Much like Elementor, WPForms empowers you to create captivating landing pages that enhance form conversions and captivate your audience.
What sets WPForms apart is its seamless integration with the Form Pages addon, allowing you to effortlessly transform any form you create into a dynamic landing page without the need for coding. To activate this feature, simply toggle the Form Page Mode after installing and activating the plugin.
Watch the Video
Once activated, WPForms automatically generates a customizable permalink for your landing page, tailored to your brand’s identity. You can leverage this link across various marketing channels, including social media and email campaigns, to drive traffic to your landing page.
Moreover, WPForms enables comprehensive customization of your landing pages, including headers, footers, logos, color schemes, and more. By tailoring your form landing pages to align with your brand’s aesthetic and messaging, you can significantly boost conversions and user interactions, ultimately enhancing submission rates.
6. Save and Resume Addon
Occasionally, users may find themselves pressed for time and unable to complete a form in one sitting. In such instances, WPForms presents the Save and Resume addon, a valuable tool that enables users to save their progress and return to it later at their convenience. This addon effectively eliminates the frustration of having to restart the form-filling process due to unforeseen issues such as network interruptions or technical glitches.
Watch the Video
7. Even More Addons
Discover even more addons to further customize your WPForms experience. While we’ve covered some essentials, there’s a wealth of additional options to explore, including payments, email marketing, customer relations, and more. Click the link below to view more details for each WPForms addon.
- ActiveCampaign
- Authorize.Net
- AWeber
- Brevo
- Calculations
- Campaign Monitor
- Conversational Forms
- ConvertKit
- Coupons
- Drip
- Form Locker
- Geolocation
- GetResponse
- Google Sheets
- HubSpot
- Lead Forms
- Mailchimp
- MailerLite
- Offline Forms
- PayPal Commerce
- PayPal Standard
- Salesforce
- Signature
- Square
- Stripe Pro
- User Journey
- Zapier
By leveraging these add-ons and integrations, you can extend the functionality of WPForms and create powerful, automated workflows that enhance your website’s efficiency and user experience. In the next section, we’ll discuss tips and best practices for optimizing your forms for security, conversions, and accessibility.
Tips and Best Practices
Creating effective forms involves more than just adding fields and hitting publish. To maximize the benefits of WPForms, it’s essential to follow best practices for security, conversions, and accessibility. This section provides valuable tips to help you optimize your forms.
Ensuring Form Security and Spam Protection
To protect your forms from spam and unauthorized access, it’s crucial to implement security measures. Start by using CAPTCHA or Google reCAPTCHA, which WPForms supports out of the box. These tools add a verification step to ensure that submissions are made by real users and not bots. Additionally, WPForms includes a honeypot spam protection feature that adds an invisible field to your form. Bots that fill out this field are automatically blocked, enhancing security without inconveniencing users.
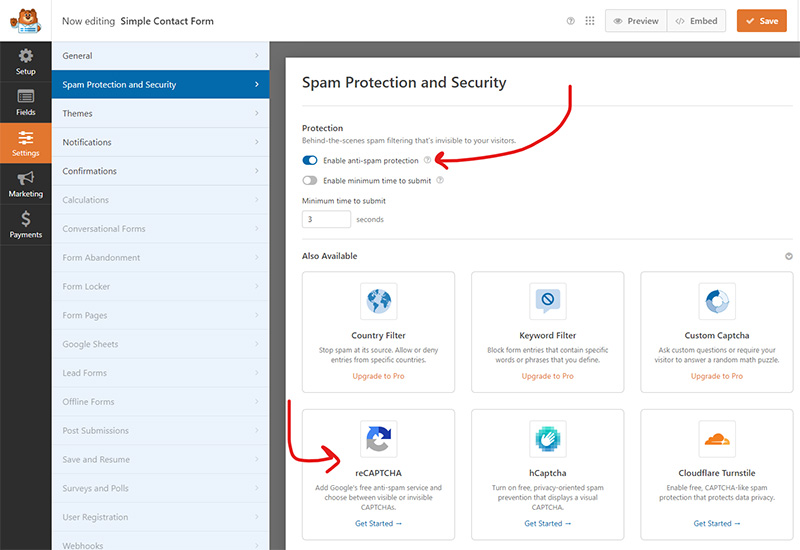
If you’re accepting payments through your forms, always use secure payment gateways like PayPal or Stripe. These gateways encrypt payment information and comply with industry security standards, ensuring that your users’ financial data is protected. Regularly updating WPForms and all add-ons is another key practice. Updates often include security patches and improvements, so keeping your plugin up to date is essential for maintaining security.
Optimizing Forms for Conversions
To improve form conversion rates, keep your forms simple and relevant. Only include fields that are necessary for your purpose. Long forms with too many fields can deter users from completing them. By simplifying your forms, you increase the likelihood of submissions.
Your call-to-action (CTA) should be clear and compelling. Use action-oriented language like “Submit,” “Sign Up,” or “Get Started” for your submit buttons, and customize the button’s appearance to make it stand out. Implementing conditional logic can also enhance the user experience by showing or hiding fields based on user responses. This makes your forms more relevant to each user and reduces the amount of information they need to fill out.
Optimizing form placement is another critical factor. Place your forms in prominent locations where users are most likely to see them, such as a contact form on a dedicated “Contact Us” page or a newsletter signup form in the sidebar or footer. Conduct A/B tests to determine which form layouts, fields, and CTAs perform best. Use insights from these tests to optimize your forms for higher conversion rates.
Accessibility Considerations
Ensuring your forms are accessible to all users, including those with disabilities, is essential. Use descriptive labels for all form fields, which helps users understand what information is required and improves accessibility for screen readers. Provide instructions and clear error messages to guide users through the form completion process.
Keyboard accessibility is another crucial aspect. Test your forms to ensure they can be navigated using only the keyboard. Users should be able to tab through fields and submit the form without using a mouse. Additionally, use high-contrast colors to ensure that text and background colors are easily readable, particularly for users with visual impairments.
When using CAPTCHA or reCAPTCHA, ensure they are accessible. Google reCAPTCHA, for example, provides an audio option for visually impaired users. By following these accessibility best practices, you create a more inclusive experience for all users.
By implementing these tips and best practices, you can create secure, user-friendly, and high-converting forms that cater to a diverse audience. In the next section, we’ll discuss the different pricing and plans available for WPForms, helping you choose the right option for your needs.
Support and Documentation
In addition to its user-friendly interface, WPForms provides robust customer support and comprehensive documentation, including tutorials covering installation, configuration, and troubleshooting.
Upon visiting the official website’s homepage, users are greeted with prominent features highlighted alongside video guides, simplifying the identification of desired features. Furthermore, the Resources tab conveniently offers links to documentation, the blog, the Facebook page, and the developers’ resource page.
The documentation section presents well-written and neatly organized articles, categorized into relevant topics for easy navigation. Whether you’re a beginner or a developer, you’ll find ample resources to guide you through using and customizing WPForms.
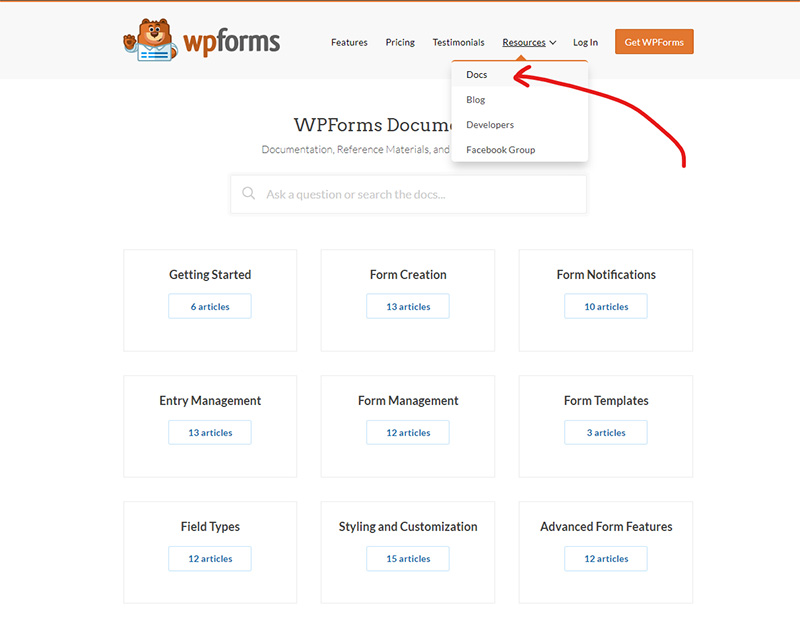
Image Source: wpforms.com
For technical issues, users are encouraged to submit a ticket by completing a brief form, ensuring their query is directed to the appropriate department. This streamlined process facilitates efficient resolution of technical concerns.
For general inquiries, users can submit a simple form containing essential details such as name, email, website, and message. By selecting a topic from the dropdown menu, users ensure their message reaches the relevant team, expediting the assistance process.
Pricing
WPForms not only stands as the most robust WordPress form builder plugin but also offers affordability at its core. With a range of plans tailored to diverse needs, users can select the most suitable option based on their specific budget and form-building requirements. A noteworthy aspect is the availability of WPForms Lite, the free version of the plugin, allowing users to start with a basic version before upgrading to a premium plan.
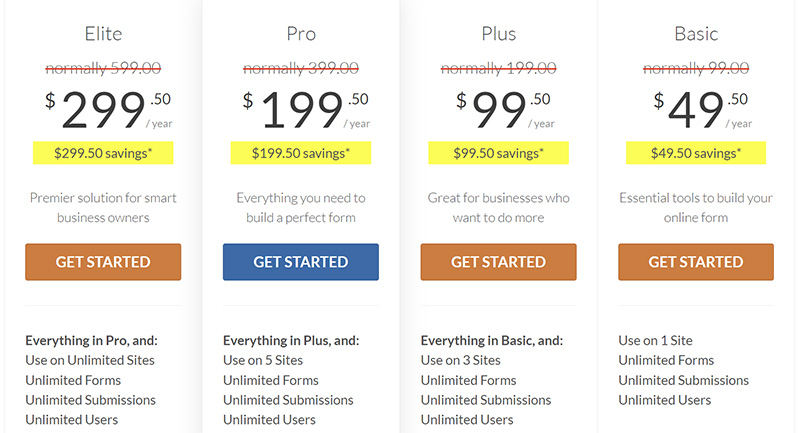
Image Source: wpforms.com
The basic plan, priced at $49.50 per year, offers unlimited forms, users, and submissions, catering perfectly to startups and small businesses. Key features of this plan include file uploads, multipage forms, import/export tools, page builder support, spam protection, and custom thank you pages.
For users seeking integration with email marketing tools such as Constant Contact, the Plus plan is available starting from $99.50. Additionally, users can explore payment acceptance capabilities with the Pro plan, starting from $199.50.
The WPForms Elite plan, starting from $299.50 per year, is ideal for larger organizations with multiple online assets, offering unlimited usage across sites and comprehensive features similar to the basic plan. Notable features include premium integrations, client management, advanced access control, and premium support, among others.
Furthermore, all plans come with a 14-day money-back guarantee, providing users with peace of mind and the option for a hassle-free refund if they are not satisfied with the plugin for any reason.
Is WPForms Worth The Cost?
Absolutely, WPForms is worth the investment for anyone seeking to streamline their form creation process and enhance user engagement on their WordPress site. The ease of use and robust features it offers make it a valuable tool for both beginners and experienced users alike. With WPForms, you can easily select from over 1,700 templates (66 templates are free to use) to effortlessly design a wide range of forms, from basic contact forms to advanced surveys and payment forms, without needing any coding expertise.
Furthermore, the impact that WPForms can have on your website’s performance and user experience is undeniable. High-quality forms are essential for facilitating communication, gathering important data, and driving conversions. WPForms excels in these areas by providing intuitive features such as conditional logic, multi-page forms, and seamless integration with third-party services, all of which contribute to improved user engagement and satisfaction.
When considering the cost of WPForms, it’s important to weigh it against the benefits it brings. The time and effort saved in form creation and management, coupled with the enhanced functionality and user experience, make WPForms a highly worthwhile investment. Plus, with reliable support and ongoing updates, you can trust that WPForms will continue to deliver value for the long term. In conclusion, if you’re looking to elevate your website’s forms and enhance user engagement, WPForms is definitely worth the cost.
WPForms Frequently Asked Questions (FAQs)
Conclusion: Unlock the Power of WPForms for Your WordPress Site
WPForms is a versatile and user-friendly form builder plugin that can transform your WordPress site by making it easy to create powerful, customized forms. Whether you need a simple contact form, a complex multi-page survey, or an integrated payment solution, WPForms offers the features and flexibility to meet your needs.
In this guide, we’ve covered everything from installing and setting up WPForms to creating and customizing forms, leveraging advanced features like conditional logic and multi-page forms, and ensuring your forms are secure, optimized for conversions, and accessible. We’ve also explored the various add-ons and integrations available, as well as the different pricing plans to help you choose the best option for your website.
By following the tips and best practices outlined in this guide, you can create forms that not only enhance user experience but also drive engagement and conversions. Whether you’re just starting or looking to upgrade your existing form solutions, WPForms provides the tools and support you need to succeed.
Get Started with WPForms Today!
Ready to take your WordPress forms to the next level? Start creating powerful and user-friendly forms with WPForms today. Whether you need basic forms or advanced integrations, WPForms has the right plan for you.
With WPForms, you can streamline your form creation process, improve user interaction, and achieve your website goals more efficiently. Don’t wait any longer – unlock the full potential of your WordPress site with WPForms.


About the Author
Jason Holicky is the founder of Holicky Corporation, a successful marketing agency in New Lenox, Illinois. With over 25 years of experience, he specializes in marketing consulting, website development, corporate photography, video editing, and social media management. Jason is passionate about helping businesses thrive and staying updated with marketing and technology trends. He is a certified Google Ads expert and AppDirect technology advisor.
Related Posts


Ready to Elevate Your Online Presence? Let’s Get Started!
Take the first step towards a robust online website system with our expert web development services. Whether you’re looking to create a custom website, build a scalable Content Management System, or develop seamless APIs, our team is here to bring your vision to life. Contact us today to discuss your project and discover how our custom solutions can transform your online platform.